Monday 19 December 2016

Highclere - The layout that never was?

Hello.

Apologies for doing this at this time of the year, it has once again been on my mind now for a while and I wanted to open it upto friends to try and gauge others opinions....

For a while now I have been (once again!) thinking of scrapping the layout. Progress on it for a number of years now has been painfully slow and enthusiasm has been virtually non-existent. I have tried to put it into a number of pros and cons...

FOR
  • Its always been my best work, I have tried my best to recreate something.
  • I have invested nearly 10 years of work into the layout
  • Its what I am known for and a good example of my modelling abilities
  • It always seems to get invited to shows (even if I always turn them down!)
  • It gives me focus to my modelling
AGAINST
  • It takes up valuable space in my flat
  • I have no interest in taking it to shows or operating it, just building it
  • I cannot set it up at home so the only time I get to test it is at a show
  • Its not 100% my area of interest
  • I feel guilty if I work on things which aren't 'connected' to the layout somehow.
So, what do I do? As I mentioned above I don't have any real interest in the layout and haven't for a while now. I havnent got an alternative place to store it so its here semi-packed up in my hallway getting in the way as there is nowhere else I can pack it up. The thing is I cant really bring myself to throw it in a skip even where it seems clear to me it would be the right thing to do.

Thoughts, opinions, and ideas will be gratefully recieved...

Julia.

Sunday 16 October 2016

Copper Chimneys

Hello.

For a couple of upcoming projects of mine I needed a source of some GWR type chimneys. The original plan of mine was to use some bits from the excellent range of castings that Nick Tilson of N Brass produces. The thing is his castings are in Brass and I wanted to do the distinctive copper capped chimneys that so many GW engines had so this is my solution...

First I found some great little blog posts that Paul has done HERE which show in fantastic detail how he produces them. This seemed the ideal way to try making my own but, once again, they were Brass. My idea was then to do some research to find out what the best grade of Copper was to machine as there is a good range of alloys available, some of which are a pain to machine. The final decision went to some C109 Copper and was duly ordered via Ebay  HERE

Once the Copper had arrived and I have time I firstly scales a works drawing for a chimney which provided me with the dimensions I needed so then I promptly made a start. My plan was to make the whole chimney out of Copper so once it is painted the top could then be polished up, looking all GW.
Machining the Copper was a dream, it cut really well and left a good finish. For your information the plaster covering a cut isn't due to me being clumsy on the lathe, its from an earlier DIY job!
Above shows what they look like after being turned on the lathe. It took a couple of attempts to get some which I was happy with, the chimney on the far left of the picture is one of those failures. I decided to keep it so I had something to experiment with on the next step. The steel bush was also required for the next bit.

As per Paul's posts the next step was to hold the chimney in position and then form the base around a suitable bar similar to the boiler diameter. I used (ironically) the copper bar which was used to make the chimneys from and my manual milling machine.

So above are the finished chimneys. Thanks to Paul the whole thing went well and definitely weren't as daunting to make as I first thought. I now have much more confidence making bits for boilers.

Julia.


Tuesday 4 October 2016

Cheap Chinese Trees

Hello again.

A sort while ago I was browsing Ebay (as you do!) and stumbled upon a couple of listings which caught my attention.
http://www.ebay.co.uk/itm/351506263843?_trksid=p2057872.m2749.l2649&ssPageName=STRK%3AMEBIDX%3AIT
 http://www.ebay.co.uk/itm/291560823046?_trksid=p2057872.m2749.l2649&ssPageName=STRK%3AMEBIDX%3AIT
Now one of the things which has been annoying my about the layout is the lack of trees so I hatched a plan to 'bulk out' the layout in a few places with some more generic trees. The thought was that maybe these cheap trees could provide a good armature to use some more 'realistic' methods upon.
Once the trees arrived the first thing I did was to remove the existing foliage, fortunately it was possible to pull the foliage off the armatures by hand, it seemed to be glued in place using a hot melt glue gun or similar.

 This left me with a plain plastic armature which I could then start on. The next step was to add some more realistic bark and being a fan of the Bark powder by Treemendus (http://www.treemendus-scenics.co.uk/tree-kit-order/) I needed a way to glue this onto the armature.
The method I ended up using was to buy some cheap varnish in a big enough tin so I could dunk the whole armature into the tin. Once the majority of varnish had dripped back into the tin the next step was to  apply the bark powder. I did this by using a small sieve (a bit messy).
It was then onto the foliage. The tree needed bulking out so I decided to use some Woodland Scenics Polyfibre (http://woodlandscenics.woodlandscenics.com/show/category/GCPolyFiber) which was dotted all over the armature. I found it wasn't necessary to glue it in place as the texture on the armature held it in place.
This was then given a spray of some Peco scenic spray adhesive (http://www.osbornsmodels.com/psg-11-peco-scene--layering-spray-400ml-39767-p.asp) and covered in various ground scatters.
Once the glue had dried all the trees were then given a final trim and then added to the layout. The main bit of the layout I wanted to cover up with trees was the area to the left to cover the hole in the backscene.
So there you have it. Total cost for about 20 trees from China is about £5.00.

Please, let me know what you think...

Julia.


Tuesday 16 August 2016

Sometimes it doesnt always go to plan...

Hello.

Its about time for another post me thinks.
As the title says, sometimes the best ideas and plans in my head don't always work and below is a classic case of that. This time it was inspired by some recent posts regarding the influx of mini motors from China and in this instance some tiny 3x4x12.8mm which were ordered sharpish from here EBAY LINK

After some initial thoughts I came up with the idea of using these as a miniature axle motor and just fit some wheels onto each end. The idea sounded right in my head and once the motors have been delivered I carried out some simple checks just to make sure the ideas would physically work, so far so good.
Next on from this was to find something to motorise using this new design. I had a choice between a small shunter type or a bus. The bus idea appealed to me but at the time a lack of some suitable donor vehicle lead me to try the shunter option. I had an etch for a Ruston 48DS lying about so the basic structure was put together so I had an idea of the volume I had.
To start with I machined up a set of 4 wheels using the lathe. The rims were made from some Nickel Silver and the middles from Paxolin. These were then pressed onto the motor shafts to see what they looked like.
Next was the chassis design and construction which, to be honest sort of 'evolved' as it took some time trying to figure out things like mounting the motors. I came up with a design that looked like it would work eventually though.
At this point I was getting quite excited until it was wired up and tested. Then it became apparent that this design might not be as good as it was in my head. The problem is the motors just arent powerful enough to deal with something like this. The chassis design had wire pickups to the wheel rims and even with these adjusted so they are hardly touching the rims, the wheels refused to revolve at all. If I am having trouble already then the chances of it pulling itself along is negligible.
Its a shame really but I am now thinking it would be best to put this to one side for now and come back to it sometime in the future once I have figured out a better was to motorise it. Things don't always go the way I hoped they would!

Anyway, on a better note, the 14xx is finished (apart from its decoder) and I am extremely happy with the way its turned out (thanks Steve). Thats another engine ticked off my list!
Julia :o)

EDIT:

OMG! I just noticed I havent really explained the 14xx! So here goes...


So, the original boiler was stuffed full of lead but I found it just wasn't heavy enough to pull anything. The idea came to replace the lead with a big slug of tungsten but as all the lead was stuck fast with super-glue I decided to replace the boiler section. This was scratch built with castings fro N Brass and my rivet tool  was used fr the first time to do the smokebox details. The tungsten (recycled dart) was then machined to be a snug fit inside the Brass boiler.

:o)


Monday 30 May 2016

OK, its time to have a catch up on things.

Hello.

Its been a while I know but I don't want to end up posting about things that don't really deserve a post in their own right. I would much rather save up a couple of bits and put it all together into a single post. Then, hopefully, it makes my stuff a little bit more interesting. Im far from the the fastest of people to produce things. This weekend I was at the Railex exhibition and saw Mick and Alan who were aiming to produce a layout in a weekend, that amazes me as do anyone else who can 'knock things together' in a weekend. The 22xx engines of mine are a classic example of my speed. These were started over the Christmas break (2015 before anyone asks!) as a 'quick project' and as you can see below they are still very much work in progress.
Anyway, enough of my waffle, here is a bit of an update on the bits and bobs I have been doing...

Q1

In previous posts I have shown progress on some CNC machined wheels. These were ultimately for the Dapol Q1 which I attempted to convert a few years back. Anyway, this work then prompted a complete overhaul of the engine and the result of which can be seen below. The list of work was as follows...
  • Re-wheeled with home brew CNC machined wheels.
  • Replaced the intermediate gearbox with a new CNC machined body and MOD 0.2 gears.
  • Replaced the coupling rods with a pair of custom etched ones.
  • Replaced both CV joints with a couple of my designed and 3D printed joints.
  • Reworked the tender wheels by replacing the steel axles (pin points) and insulating bushes.

Its lots better than the previous version by quite a bit, there are no more wobbly wheels anymore and it runs much smoother.  The engine has a slight bit of 'cogging' at slow speeds which I think might be a slight discrepancy between the worm and the worm wheel but I am in two minds if to strip and replace or see if a decent bit of running improves it. Next step is to fit a decoder.

22xx

 These two engines are turning into another 'slow burner' project (I cant really afford another one!). I must admit though that I am particularly pleased with how these are turning out and I can say that to date these two are the best engines I have ever produced. Currently I have been working my way through the brake gear for the engines and once this is done it will be onto the tender brakes. Sadly the plastic brake bits you get with the tender 'kit' from the association doesn't seems to fit so I put together an etch for the brakes so I just need to work out how to fit them.


Rivet Press

This is the latest thing off of my workbench. There are a few future projects where I will need something to form rivets so I came up with the idea for this tool.
Its based upon a pair or parallel jaw pliers which were produced to punch holes in metal. The advantage of using these is I could remove the bits designed for punching holes and replace them with some bits to form rivets. These were turned up on my lathe from silver steel and hardened. The 'pointy bit' is adjustable using a M3 thread and locknut so the rivet pliers can be adjusted to suit various thickness's of metal. I am happy with the resulting formed rivets on standard 0.2mm thick Nickel Silver sheet and I am looking forward to using it in anger sometime in the future.


So you lot are now upto speed on what I have been doing. There are a few other bits and bobs in the pipeline but I will post about those when there is enough progress to show you all.

Julia :o)

P.S. Highclere is due to go to the CMRA show in Stevenage Jan 2017. I'm feeling the pressure already!

Monday 15 February 2016

Boxpoking about

Hello.

So what have I been upto since my last post I hear you all ask. Well, I have been mostly CNCing stuff.

I have a Dapol Q1 which has been treated to a conversion a while ago. For those of you who remember it I ended up writing an article for the Model Railway Journal which ended up in issue 211. The problem was that I was never happy with the results. While the engine did run it wasn't upto my standards as the wheels were a kind of hybrid of dapol and 2mmSA.


As with many things in life, the older you get, the more knowledgeable you get and this is a classic case. Since my last attempt at conversion I have rethought an approach to producing the wheels for another attempt at getting something I am happy with. This time armed with a CNC mill I made a start...


This is how the wheel started off. A 3D model of a scale wheel with a 2mmSA rim attached, from this I can generate a CNC programme. In my previous post I showed how I turned up the blanks from Paxolin and added the association rims.

The wheel blanks were clamped in a rotary table and clocked with a dial test indicator to ensure they were centred correctly. I had a frustrating time getting the DTI to fit the milling machine because of the depth on the Z axis wasn't enough. This meant I had to make a little bracket (seen clamped to the mill chuck) which was a pain.
Once the wheel was centred the programme was then run. The milling cutter is a 0.5mm slot drill which conveniently was suitable for all the milling and drilling operations. The programme took about an hour per wheel. It seemed to take forever to do all 7 (6+1 spare) spread over a number of evenings.
And these are the result to date. The backs need tidying up a bit on the lathe but other than that the next step is cutting some axles and fitting them to the chassis.

Am I happy with them? Definitely, they look like Boxpok wheels and fingers crossed they are an improvement on the previous attempt.

Julia.


Tuesday 2 February 2016

Not gone, back once again.

Hello Folks.

Wow, was it really October last year when I made my last blog post? Doesnt time fly when you get on with things. With many of my other projects, enthusiasm comes and goes, thoughts appear and ideas are tested. To be honest the vast majority of the time it doesnt feel like I have enough to warrant a blog posting so instead of waffling on about nothing in particular I do try to save up things a bit to hopefully make the blog posts interesting.

So, what have I been upto since my last blog post I hear you all ask? Here is a summary of the bits and bobs I have been playing with, it might be interesting to some? I really hope at least a single person gets some inspiration from it all...

1. GWR 22xx

 This has been a project that has been ongoing for a bit now. I restarted it over the Christmas break as the layout was once again packed away for the festivities. As per pretty much all my projects the starting point was a scale drawing which was then added into AutoCad where the size, shape, and gearing was worked out. In the particular case of these engines the CAD drawings were then imported into Inventor (my 3D package of choice) where I have a nice little plugin that converts the 3D into G code ready for my CNC.

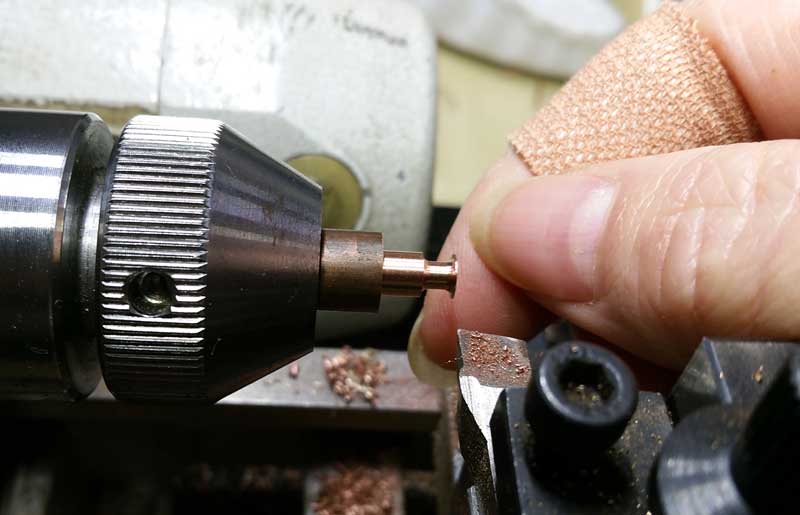
This is the setup. As you might realise from the majority of my photos my workbench is basically my PC table so when the machines are out the PC takes second priority.
This is an image of the CNC chopping up some PCB material. In this instance its a sideframe for one of the tender chassis. The cutter is a 1mm diameter Carbide slot drill (for those who are interested!
Once all the bits I need are cut out its then a case of soldering the bits together as per a etched chassis. They are accurate enough not to be reliant upon the axle holes to line everything up.
This is the resultant of the tender bits an bobs to date. The motor is a 2MMSA component. These two chassis are destined for a dapol 22xx tender body.
And this is one of the chassis to date. There is still lots to do which I work through once I have figured out what to do. Its the first tender engine I have built replacement chassis for so there are new challenges for me. I have designed a little bracket on the engine that means the worm can be easily removed if needed, to me its an essential part of a chassis.

2. Q1

I have decided to remake the wheels for my converted Dapol Q1 engine. The originals didnt run as concentric and wobble free as I would have liked so I have made a start on a new design.
The first part of the idea was to turn up some wheel blanks which use standard 2mmSA wheel rims. The blanks are made from a Paxolin type of material bought on Ebay, the rims are glued into position with a spot of loctite.
These are the blanks to date ready for profiling. The three on the right are scrapped parts which didnt 'turn' out right (it happens) and as you might have noticed I have seven passable wheels so there is a spare just in case of future errors.

More will follow on this as I make progress.

3. Mamod

A bit of a curved ball this one but at a toyfair over the holidays I picked up this for the total sum of £35.
The original thought for this was to replace the chimney and lave it at that but of course its changed now. As my confidence with the machines I own is growing the ideas are starting to develop, so there are some small plans for this now. It doesn't involve making a chimney though, does anyone know where I can find one?

4. P.C.

OK, so not modelling but worth mentioning. Over the holidays I invested in a laptop PC. This is a departure for my as previously its always been a desktop PC. The BIG advantage is that I now have CAD-TO-GO and recently tested this out at the ST Albans show where I demonstrated my CAD work. It seemed to go down well so hopefully I will be doing more of this at shows in the future.

Right, I think thats this blog up to date now. Let me know what you think...

Julia :o)